
Your first identity verification
Build a sandbox verification before asking a real customer for identity documents. This tutorial covers account setup, a hosted capture session, and the result your backend must check. Allow about 20–30 minutes for the first integration.
Before you start
You need an account, a yv_test_… key, a backend or terminal, and a stable reference for the test person in your own system. Test mode simulates verification decisions; it is not evidence that a real person's identity has been checked.
Screenshots show the public product screens captured on 24 October 2026. No account, credential or identity submission was created for these screenshots. Response snippets below illustrate structure; your IDs and timestamps will differ.
1. Set up an account and keep both keys
If you already have a sandbox key, skip to step 3. Otherwise, the sign-up screen shows the account details you need:
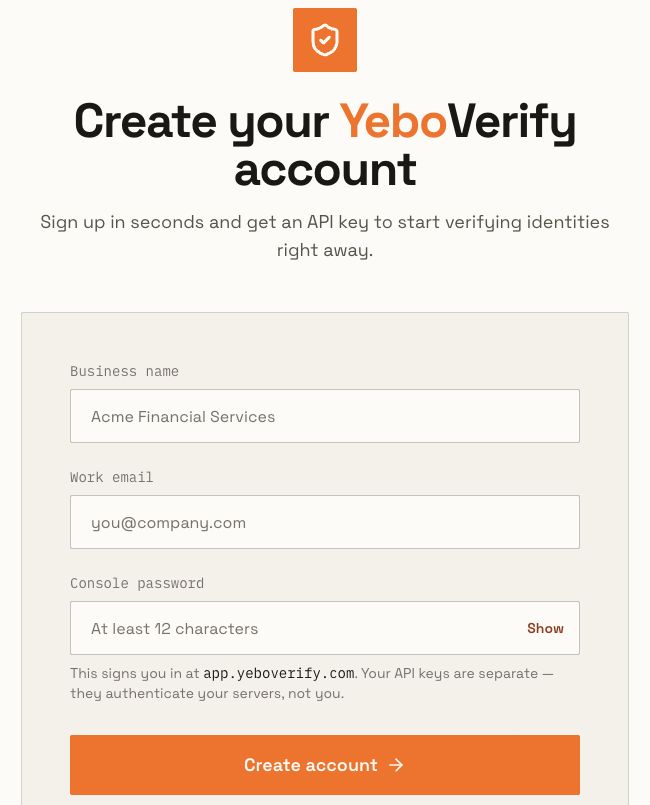
The account password is for the operator console; API keys are separate server credentials. Select the image to view it full size.
Use your business name, an email you control and a unique console password. A new account can also be created once from your server with POST /v1/signup:
curl --fail-with-body --silent --show-error -X POST 'https://api.yeboverify.com/v1/signup' -H 'Content-Type: application/json' --data @signup.jsonCreate signup.json locally with your own name, email and password. Keep it outside source control, then remove it after setup. Choose either browser signup or API signup for a new email; do not submit both as if they created different accounts.
The API signup response includes data.apiKey (yv_live_…) and data.testApiKey (yv_test_…). Save both in server secret storage when they are revealed. They cannot be read back later. The browser's success panel currently highlights the main API key; do not mistake a yv_live_ key for a sandbox credential. If an existing account's test key is unavailable, resolve access with YeboVerify support before continuing; do not create a second business with the same email.
Check before continuing: you have the test key, know which email owns the account, and have not put either API key in a client-side app.
2. Understand the console sign-in
Open the operator console. Sign in using the work email and console password you set during signup.
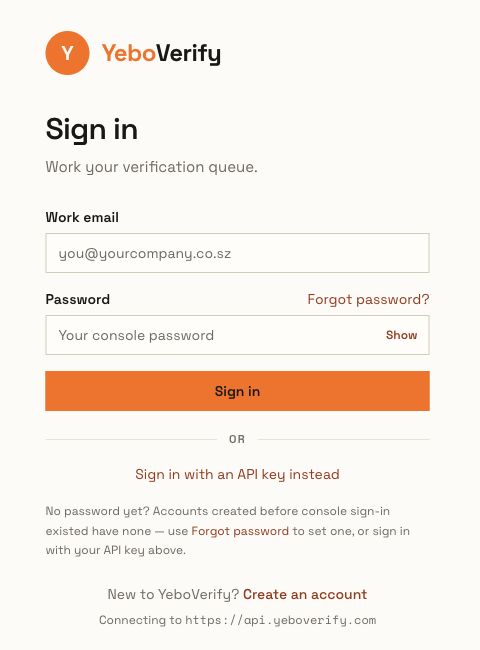
Console access is different from authenticating a verification API call. Select the image to view it full size.
If the account predates console passwords, use Forgot password and complete the email recovery flow. An API key is not the password field's value. Console sign-in gives you a place to review operations; your server still authenticates API requests with X-API-Key.
3. Use the sandbox key on your backend
Set the key in your server environment:
export YEBOVERIFY_API_KEY='yv_test_REPLACE_WITH_YOUR_TEST_KEY'Before a test run, confirm the value starts with yv_test_. The API host and key mode are separate: a test key can be used with https://api.yeboverify.com; changing the URL alone does not turn a live key into a test key.
Keep the key on your server. Do not put it in a frontend .env variable exposed to browser code, a mobile bundle or a verification link.
4. Create a hosted verification session
Use an internal reference such as tutorial-person-001 for userId. Your backend should associate that reference with the signed-in person before creating a session.
curl --fail-with-body --silent --show-error -X POST 'https://api.yeboverify.com/v1/sessions/create' -H "X-API-Key: $YEBOVERIFY_API_KEY" -H 'Content-Type: application/json' -d '{"userId":"tutorial-person-001"}'The successful response is flat, for example:
{
  "success": true,
  "session": "SESSION_TOKEN",
  "verifyUrl": "https://verify.yeboverify.com#session=SESSION_TOKEN",
  "expiresIn": 1800
}
Read response.verifyUrl, not response.data.verifyUrl. Your backend can return that URL to the person's browser and redirect them to the hosted capture page. Creating a session does not mean the person has submitted any documents.
Check before continuing: a real API response has success: true, a non-empty verifyUrl, and an expiry. A failed request must remain an error; never replace it with a made-up capture link.
5. Walk through the hosted flow
- Open the returned
verifyUrlwhile it is valid. Keep the#session=fragment intact. - Follow the hosted instructions for the required document and face/liveness capture. Allow camera access only when you are ready to use that flow.
- In sandbox mode, use non-personal test material. A simulated approval is not a live identity approval.
- Finish the submission and return to your application as your integration directs.
- Show an in progress state while the backend waits for the result.
Your application delivers or displays the link. YeboVerify does not automatically send it to the person by SMS or email. Treat the session URL as a temporary credential; do not publish or log its full token.
For a custom capture implementation or live liveness requirements, follow Mobile Integration and SDKs. The hosted route avoids putting your customer API key on an end-user device.
6. Receive and verify the result
Set up a public HTTPS endpoint using the Webhooks guide. The key events are:
| Event | Your application should do |
|---|---|
verification.submitted | Mark the person's verification as in progress. |
verification.completed | Read the final decision after verifying the webhook signature. |
Verify X-YeboVerify-Signature-V2, reject untrusted deliveries, and de-duplicate using eventId. A successful session-creation response or a browser returning to your app is not a substitute for the final decision.
If you have the returned verification ID, you can also check it from your server:
curl --fail-with-body --silent --show-error 'https://api.yeboverify.com/v1/verifications/VERIFICATION_ID' -H "X-API-Key: $YEBOVERIFY_API_KEY"Replace VERIFICATION_ID with the actual ID. Inspect status and decision, not just the HTTP status.
| Decision | What to build |
|---|---|
APPROVED | Continue the permitted action after matching the result to the right person. |
REJECTED | Explain that verification did not pass and show the supported next step. |
NEEDS_REVIEW | Keep the action pending for manual review. |
For deterministic rejected/review tests and direct sandbox uploads, use the API examples and API reference. Build those branches before enabling live traffic.
If you get stuck
| Symptom | What to check |
|---|---|
| Email already exists | Sign in or recover the existing account; do not repeat signup. |
401 | Check X-API-Key, key prefix and that the key is still active. |
verifyUrl is undefined | Session responses are flat. Check response.verifyUrl. |
| Capture link expired | Create a fresh session when the person is ready; do not reuse a stored old URL. |
| Camera does not open | Use HTTPS and a supported browser, then review the browser's camera permission. |
| No final decision | Check webhook reachability and signature handling, then inspect the actual verification ID. |
NEEDS_REVIEW | Keep the review state visible instead of treating it as approval. |
Before going live
Finish the rejected and review paths, verify your signed webhook handler, and configure a spend limit. Switch the server to the live key only when the production capture requirements and your own acceptance checks are complete. Continue with Webhooks, verification policies and Error Codes.